

<div style="border: 0px solid rgb(153, 153, 153); overflow: auto; width: 300px; height: 200px; text-align: left; "> <script style="text/javascript" src="http://kendhin.890m.com/comments.js"></script><script style="text/javascript">var a_rc=10;var m_rc=false;var n_rc=true;var o_rc=40;</script><script src="http://tips-ofblog.blogspot.com/feeds/comments/default?alt=json-in-script&callback=showrecentcomments"> </script> <div class="clear"></div></div>
<div style="border: 0px solid rgb(153, 153, 153); overflow: auto; width: 300px; height: 200px; text-align: left; "> <script src="http://smkserian2008.googlepages.com/recent-post.js"></script> <script>var numposts = 25; var showpostdate = false; var showpostsummary = false; var numchars = 100; </script> <script src="http://tips-ofblog.blogspot.com/feeds/posts/default?orderby=published&alt=json-in-script&callback=rp"> </script> <div class="clear"></div></div>
<script language="JavaScript">Now you can manage this script by focusing in Red line and manage your banner height and width by changing the size in RED line. You can also add your banner how many banners you want to show in your blog. I hope your work can work well.
<!-- Begin
var Ads_Sum = 5;
var Cur_Time = new Date()
var second = Cur_Time.getSeconds()
var Ads_Sub = second % Ads_Sum;
Ads_Sub +=1;
if (Ads_Sub==1) {
txt="";
url="Your URL Target";
alt="Your Banner Title";
banner="Your Banner URL";
width="468";
height="60";
}
if (Ads_Sub==2) {
txt="";
url="Your URL Target";
alt="Your Banner Title";
banner="Your Banner URL";
width="468";
height="60";
}
if (Ads_Sub==3) {
txt="";
url="Your URL Target";
alt="Your Banner Title";
banner="Your Banner URL";
width="468";
height="60";
}
if (Ads_Sub==4) {
txt="";
url="Your URL Target";
alt="Your Banner Title";
banner="Your Banner URL";
width="468";
height="60";
}
if (Ads_Sub==5) {
txt="";
url="Your URL Target";
alt="Your Banner Title";
banner="Your Banner URL";
width="468";
height="60";
}
document.write('<left>');
document.write('<a href=\"' + url + '\" target=\"_top\">');
document.write('<img src=\"' + banner + '\" width=')
document.write(width + ' height=' + height + ' ');
document.write('alt=\"' + alt + '\" border=0><br>');
document.write('<small>' + txt + '</small></a>');
document.write('</left>');
// End -->
</script>


.showpageArea {padding: 0 2px;margin-top:2px;margin-bottom:5px; } .showpageArea a {border: 1px solid #bddbe6; color: #000000;font-weight:normal;background:#fff; padding: 3px 6px !important;font-size:11px; margin:0px 2px; text-decoration: none;-moz-border-radius:5px; } .showpageArea a:hover {border: 1px solid #bddbe6; color: #000000; background: #bddbe6;} .showpageNum a {border: 1px solid #bddbe6; color: #000000;font-weight:normal; font-size:11px; padding: 3px 6px !important;margin:0px 2px; text-decoration: none;-moz-border-radius:5px;} .showpageNum a:hover {border: 1px solid #bddbe6; color: #000000;background: #bddbe6; } .showpagePoint {font-size:11px;-moz-border-radius:5px; padding: 2px 5px 2px 5px;margin: 2px;font-weight: bold; border: 1px solid #0066cc; color: #fff; background: #0066cc;} .showpage{font-size:11px;-moz-border-radius:5px;} .showpage a:hover {font-size:11px; border: 1px solid #0066cc; color: #fff;background-color: #0066cc;} .showpageNum a:link,.showpage a:link {font-size:11px; padding: 2px 4px 2px 4px; margin: 2px; text-decoration: none;border: 1px solid #bddbe6; color: #000;background-color: #FFFFFF;} .showpageNum a:hover {font-size:11px; border: 1px solid #bddbe6;color: #000000; background-color: #bddbe6;font-weight:normal;}
<script type="text/javascript"> function showpageCount(json) { var thisUrl = location.href; var htmlMap = new Array(); var isFirstPage = thisUrl.substring(thisUrl.length-5,thisUrl.length)==".com/"; var isLablePage = thisUrl.indexOf("/search/label/")!=-1; var isPage = thisUrl.indexOf("/search?updated")!=-1; var thisLable = isLablePage ? thisUrl.substr(thisUrl.indexOf("/search/label/")+14,thisUrl.length) : ""; thisLable = thisLable.indexOf("?")!=-1 ? thisLable.substr(0,thisLable.indexOf("?")) : thisLable; var thisNum = 1; var postNum=1; var itemCount = 0; var fFlag = 0; var eFlag = 0; var html= ''; var upPageHtml =''; var downPageHtml =''; var pageCount=3; var displayPageNum=5; var firstPageWord = 'First'; var endPageWord = 'Last'; var upPageWord ='Previous'; var downPageWord ='Next'; var labelHtml = '<span class="showpageNum"><a href="/search/label/'+thisLable+'?&max-results='+pageCount+'">'; for(var i=0, post; post = json.feed.entry[i]; i++) { var timestamp = post.published.$t.substr(0,10); var title = post.title.$t; if(isLablePage){ if(title!=''){ if(post.category){ for(var c=0, post_category; post_category = post.category[c]; c++) { if(encodeURIComponent(post_category.term)==thisLable){ if(itemCount==0 || (itemCount % pageCount ==(pageCount-1))){ if(thisUrl.indexOf(timestamp)!=-1 ){ thisNum = postNum; } postNum++; htmlMap[htmlMap.length] = '/search/label/'+thisLable+'?updated-max='+timestamp+'T00%3A00%3A00%2B08%3A00&max-results='+pageCount; } } } }//end if(post.category){ itemCount++; } }else{ if(title!=''){ if(itemCount==0 || (itemCount % pageCount ==(pageCount-1))){ if(thisUrl.indexOf(timestamp)!=-1 ){ thisNum = postNum; } if(title!='') postNum++; htmlMap[htmlMap.length] = '/search?updated-max='+timestamp+'T00%3A00%3A00%2B08%3A00&max-results='+pageCount; } } itemCount++; } } for(var p =0;p< htmlMap.length;p++){ if(p>=(thisNum-displayPageNum-1) && p<(thisNum+displayPageNum)){ if(fFlag ==0 && p == thisNum-2){ if(thisNum==2){ if(isLablePage){ upPageHtml = labelHtml + upPageWord +'</a></span>'; }else{ upPageHtml = '<span class="showpage"><a href="/">'+ upPageWord +'</a></span>'; } }else{ upPageHtml = '<span class="showpage"><a href="'+htmlMap[p]+'">'+ upPageWord +'</a></span>'; } fFlag++; } if(p==(thisNum-1)){ html += '&nbsp;<span class="showpagePoint"><u>'+thisNum+'</u></span>'; }else{ if(p==0){ if(isLablePage){ html = labelHtml+'1</a></span>'; }else{ html += '<span class="showpageNum"><a href="/">1</a></span>'; } }else{ html += '<span class="showpageNum"><a href="'+htmlMap[p]+'">'+ (p+1) +' </a></span>'; } } if(eFlag ==0 && p == thisNum){ downPageHtml = '<span class="showpage"> <a href="'+htmlMap[p]+'">'+ downPageWord +'</a></span>'; eFlag++; } }//end if(p>=(thisNum-displayPageNum-1) && p<(thisNum+displayPageNum)){ }//end for(var p =0;p< htmlMap.length;p++){ if(thisNum>1){ if(!isLablePage){ html = '<span class="showpage"><a href="/">'+ firstPageWord +' </a></span>'+upPageHtml+' '+html +' '; }else{ html = ''+labelHtml + firstPageWord +' </a></span>'+upPageHtml+' '+html +' '; } } html = '<div class="showpageArea"><span style="font-size:11px;padding: 2px 4px 2px 4px;margin: 2px 2px 2px 2px;color: #000000;border: 1px solid #333; background-color: #FFFFFF;" class="showpage">Page '+thisNum+' of '+(postNum-1)+': </span>'+html; if(thisNum<(postNum-1)){ html += downPageHtml; html += '<span class="showpage"><a href="'+htmlMap[htmlMap.length-1]+'"> '+endPageWord+'</a></span>'; } if(postNum==1) postNum++; html += '</div>'; if(isPage || isFirstPage || isLablePage){ var pageArea = document.getElementsByName("pageArea"); var blogPager = document.getElementById("blog-pager"); if(postNum <= 2){ html =''; } for(var p =0;p< pageArea.length;p++){ pageArea[p].innerHTML = html; } if(pageArea&&pageArea.length>0){ html =''; } if(blogPager){ blogPager.innerHTML = html; } } } </script> <script src="/feeds/posts/summary?alt=json-in-script&callback=showpageCount&max-results=99999" type="text/javascript"></script>
Hope it can work well in your Blogger, In advance, thanks :)
<b:section class='main' id='main' showaddelement='yes'> <b:widget id='Blog1' locked='false' title='Blog Posts' type='Blog'/> </b:section>

<div class='post-body entry-content'>
<data:post.body/>
<div style='clear: both;'/> <!-- clear for photos floats -->
</div>
<b:if cond='data:blog.pageType == "item"'>
<div class='similiar'>
<div class='widget-content'>
<h3>Related Posts :</h3>
<div id='data2007'/><br/><br/>
<script type='text/javascript'>
var homeUrl3 = "<data:blog.homepageUrl/>";
var maxNumberOfPostsPerLabel = 4;
var maxNumberOfLabels = 10;
maxNumberOfPostsPerLabel = 100;
maxNumberOfLabels = 3;
function listEntries10(json) {
var ul = document.createElement('ul');
var maxPosts = (json.feed.entry.length <= maxNumberOfPostsPerLabel) ?
json.feed.entry.length : maxNumberOfPostsPerLabel;
for (var i = 0; i < maxPosts; i++) {
var entry = json.feed.entry[i];
var alturl;
for (var k = 0; k < entry.link.length; k++) {
if (entry.link[k].rel == 'alternate') {
alturl = entry.link[k].href;
break;
}
}
var li = document.createElement('li');
var a = document.createElement('a');
a.href = alturl;
if(a.href!=location.href) {
var txt = document.createTextNode(entry.title.$t);
a.appendChild(txt);
li.appendChild(a);
ul.appendChild(li);
}
}
for (var l = 0; l < json.feed.link.length; l++) {
if (json.feed.link[l].rel == 'alternate') {
var raw = json.feed.link[l].href;
var label = raw.substr(homeUrl3.length+13);
var k;
for (k=0; k<20; k++) label = label.replace("%20", " ");
var txt = document.createTextNode(label);
var h = document.createElement('b');
h.appendChild(txt);
var div1 = document.createElement('div');
div1.appendChild(h);
div1.appendChild(ul);
document.getElementById('data2007').appendChild(div1);
}
}
}
function search10(query, label) {
var script = document.createElement('script');
script.setAttribute('src', query + 'feeds/posts/default/-/'
+ label +
'?alt=json-in-script&callback=listEntries10');
script.setAttribute('type', 'text/javascript');
document.documentElement.firstChild.appendChild(script);
}
var labelArray = new Array();
var numLabel = 0;
<b:loop values='data:posts' var='post'>
<b:loop values='data:post.labels' var='label'>
textLabel = "<data:label.name/>";
var test = 0;
for (var i = 0; i < labelArray.length; i++)
if (labelArray[i] == textLabel) test = 1;
if (test == 0) {
labelArray.push(textLabel);
var maxLabels = (labelArray.length <= maxNumberOfLabels) ?
labelArray.length : maxNumberOfLabels;
if (numLabel < maxLabels) {
search10(homeUrl3, textLabel);
numLabel++;
}
}
</b:loop>
</b:loop>
</script>
</div>
</div>
</b:if>

<link href='Your icon URL' rel='SHORTCUT ICON'/>Do not forget to change the RED line with your own icon which has been uploaded to your server.


<style type="text/css">
div.TabTampil div.TTs
{height: 24px; overflow: hidden; }
div.TabTampil div.TTs a:hover, div.TabTampil div.TTs a.Active
{ background-color: #77d0ee; }
div.TabTampil div.Halamans
{ clear: both; border: 1px solid #0199cb; overflow: hidden; background-color: #ffffff;}
div.TabTampil div.Halamans div.Halaman
{ height: 100%; padding: 0px; overflow: hidden; }
div.TabTampil div.Halamans div.Halaman div.Alas
{ padding: 3px 5px; }
div.TabTampil div.TTs a
{ border-left:1px solid #0199cb; border-right:1px solid #0199cb; border-top:1px solid #0199cb; border-bottom:0px solid #0199cb; float: left;
display: block; width: 100px; text-align: center; height: 24px; padding-top: 3px; vertical-align: middle; text-decoration: none; font-family: "Arial", Serif;
font-size: 12px; font-weight: 900; color: #222}
</style>
<form action="tabtampil.html" method="get">
<div id="TabTampil" class="TabTampil">
<div style="width: 370px;" class="TTs"> <a>TAB 1</a> <a>TAB 2</a> <a>TAB 3</a></div>
<div style="width: 335px; height: 280px;" class="Halamans">
<div class="Halaman">
<div class="Alas">
Your TAB 1 Content
</div>
</div>
<div class="Halaman">
<div class="Alas">
Your TAB 2 Content
</div>
</div>
<div class="Halaman">
<div class="Alas">
Your TAB 3 Content
</div>
</div>
</div>
</div></form>
<script style="text/javascript" src="http://meichelina.googlepages.com/newscriptab.js"></script>
<script type="text/javascript">tabtampil_inisial('TabTampil');</script><br/>
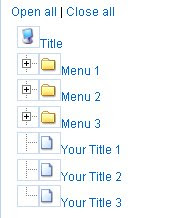

<a href="javascript: d.openAll();">Open all</a> | <a href="javascript: d.closeAll();">Close all</a><br/>
<!-- start dtree -->
<div style="text-align: left; padding-left: 6px;">
<script src="http://www.geocities.com/once179/sitemap/dtree.js" type="text/javascript"> </script>
<div style="padding-top: 6px; width: 180px;" class="dtree">
<script type="text/javascript">
<!--
d = new dTree('d');
d.add(0,-1,'Title',
'Your URL','','','', '');
//menu
d.add(10, 0,'Menu 1', '','','','', '');
d.add(11, 10,'Sub Menu 1',
'Sub Menu 1 URL','','','', '');
d.add(12, 10,'Sub Menu 1',
'Sub Menu 1 URL','','','', '');
d.add(20, 0,'Menu 2', '','','','', '');
d.add(21, 20,'Sub Menu 2',
'Sub Menu 2 URL','','','', '');
d.add(22, 20,'Sub Menu 2',
'Sub Menu 2 URL','','','', '');
d.add(30, 0,'Menu 3', '','','','', '');
d.add(31, 30,'Sub Menu 3',
'Sub Menu 3 URL','','','', '');
d.add(32, 30,'Sub Menu 3',
'Sub Menu 3 URL','','','', '');
d.add(90, 0,'Your Title 1',
'Your Title URL 1','','','', '');
d.add(91, 0,'Your Title 2',
'Your Title URL 2','','','', '');
d.add(93, 0,'Your Title 3',
'Your Title URL 3','','','', '');
document.write(d);
//-->
</script>
</div>
</div>
<!-- end dtree --></td>
#mta_bar {
background:#003366;
border-top: 3px solid #6699ff;
margin: 0;
padding: 7px 0;
z-index: 100;
bottom:0px;
right:0px;
width: 100%;
overflow: auto;
position: fixed;
}
* html #mta_bar{
/*IE6 hack*/
position: absolute;
width: expression(document.compatMode=="CSS1Compat"? document.documentElement.clientWidth+"px" : body.clientWidth+"px");
}
#mta_bar .left { float: left; text-align: center; font-family: Arial; font-size: 13px; font-weight: bold; font-style: normal; color: #0000FF; width:92%;}
#mta_bar .right {font-family: Arial, Helvetica, sans-serif; float: right; text-align: center; font-weight: normal; font-size: 10px;letter-spacing: 0; width: 30px; white-space: nowrap;}
#mta_bar .right a {font-size: 10px; color: #0000FF; text-decoration: underline;}
#mta_bar .right a:hover {font-size: 10px; color: #0000FF; text-decoration: none;}
#left_bar a {background: url('https://blogger.googleusercontent.com/img/b/R29vZ2xl/AVvXsEh_cg4hGB9AcMRmo-eNHn9VLcNXs15dC8BFJjWzNghm3lHNhguYdNR4gXRaslERBga7XwCnD4uPjTdsLx30s9qQJBd2hHeBzi5BPyVAhrYe3hhEO4zX3n3aixUQWzGf3V_IWzhosUoajSc/?imgmax=800') no-repeat; text-decoration: none; color: #fff; padding:5px 0px 5px 30px;}
#left_bar a:hover { text-decoration: underline; color: #fff; }
<script type='text/javascript'>And the last, Find the code <body> in your template and Copy Paste the following code right under <body>
//<![CDATA[
var mta_arr = new Array();
var mta_clear = new Array();
function mtaFloat(mta) {
mta_arr[mta_arr.length] = this;
var mtapointer = eval(mta_arr.length-1);
this.pagetop = 0;
this.cmode = (document.compatMode && document.compatMode!="BackCompat") ? document.documentElement : document.body;
this.mtasrc = document.all? document.all[mta] : document.getElementById(mta);
this.mtasrc.height = this.mtasrc.offsetHeight;
this.mtaheight = this.cmode.clientHeight;
this.mtaoffset = mtaGetOffsetY(mta_arr[mtapointer]);
var mtabar = 'mta_clear['+mtapointer+'] = setInterval("mtaFloatInit(mta_arr['+mtapointer+'])",1);';
mtabar = mtabar;
eval(mtabar);
}
function mtaGetOffsetY(mta) {
var mtaTotOffset = parseInt(mta.mtasrc.offsetTop);
var parentOffset = mta.mtasrc.offsetParent;
while ( parentOffset != null ) {
mtaTotOffset += parentOffset.offsetTop;
parentOffset = parentOffset.offsetParent;
}
return mtaTotOffset;
}
function mtaFloatInit(mta) {
mta.pagetop = mta.cmode.scrollTop;
mta.mtasrc.style.top = mta.pagetop - mta.mtaoffset + "px";
}
function closeTopAds() {
document.getElementById("mta_bar").style.visibility = "hidden";
}
//]]>
</script>
<div id='mta_bar'>Change the lines in Red above codes with yours rss feeds and url and text you want to show.
<div id='left_bar'><span class='left'><a href='http://tips-ofblog.blogspot.com' target='_blank'>Tips of Blog</a></span></div>
<span class='right' onmouseout='self.status=''' onmouseover='self.status='tips-ofblog.blogspot.com';return true;'> <img align='absmiddle' border='0' onClick='closeTopAds();return false;' src='https://blogger.googleusercontent.com/img/b/R29vZ2xl/AVvXsEhRAPy_M0HPf1Zmuiq6M11sOkqGleJMKR2E95oPjfXV0edenLMNFzFsopl4eQcfvakfBu5ZDVb0aczrf9lynpztrZh_trfezfAWuvJI-yrrn-prmTffyfs-w5lR1apPz7PxDPfVRQZc6nA/?imgmax=800' style='cursor:hand;cursor:pointer;'/></span></div>
Disclaimer:We does not host any of the templates available on this blog. This blog merely indexes other sites contents.