Saturday, September 4, 2010

It's been a long time since I wrote my last post... So here I post some Pop-Up Script.


In this First Script I'll give some example that You can use it in Your Blog...


Pop-up Script To Open A Window When Your Page Loads 


 Just put the following script between Your <HEAD> and </HEAD> tag


<script language="javascript">

<!-- begin


function popup(Site)

{

window.open(Site,'PopupName','toolbar=no,statusbar=no,

location=no,scrollbars=yes,resizable=yes,width=275,height=200')

}


// end -->

</script>


Then add the following code into your <BODY> tag:


onLoad="popup('URL/to/popup.html')"


Your<BODY> tag should then look something like this:


<BODY bgcolor="#ffffff" text="#000000"

onLoad="popup('http://doit2us.blogspot.com/popup.html')">


Note: In this and all script examples that follow, change the attributes "toolbar", "statusbar", etc., to on (1) or off (0) as you prefer (or omit them), and set the width and height to the size you require.


That's all.. Happy Pop-Up...

Monday, May 24, 2010

We have been discussed about How To Make A Blogger Related Post before, by written a JavaScript and CSS directly into our HTML Template.


Although this methode is more safer because we could see the naked ("true") JS and avoid the malicious script, to some people especially for newbie, it could be complicated to implemented this method.


If you are searching "The Simplest And The Smartest Blogger Related Posts" and did not bother with external JS.. (Before make this posting, I already checked that this code was "clean", even I used it too for this blog). Than I think this Blogger Related Post Tips will fit with you. I have found this code in more tech tips


To display related links at the end of every post. copy this code into a new HTML/Javascript widget and place at the bottom of the post or at the footer in the page elements section.

Widget uses jQuery v1.3.2, If you already included jQuery into your blog. no need to do it again.

<script src="http://ajax.googleapis.com/ajax/libs/jquery/1.3.2/jquery.min.js"  type="text/javascript"></script>

<script src="http://blogger-related-posts.googlecode.com/files/related-posts-widget-1.0.js" type="text/javascript"></script>

<script type="text/javascript">

relatedPostsWidget({

   'containerSelector':'div.post-body'

   ,'loadingText':'loading...'

});</script>
And this what will we look after save...


Sunday, May 23, 2010

Instead of Removed the Blogger NavBar as I mention before (Removed Blogger NvBar), A lot of better if we  make it "toggle". We can set the display of the Blogger NavBar to disappear when our mouse pointer not in the Blogger NavBar position (top of our page),


To enable the Blogger NavBar Toggle function in your blog, you can follow these...


1. Log in to Blogger .

2. On your Dashboard, select the Layout menu, than click the Edit HTML. Under the Edit Template you can see your Blog's HTML.

3. If you already do "Blogger Tip Trick No.4.: Removed The Blogger NavBar", Then you must..! delete your code..

4. Then replace it / insert with this code..

/* Blogger Navigation Bar */

#navbar-iframe {

opacity:0.0;

height: 10px;

filter:alpha(Opacity=0)

}

#navbar-iframe:hover {

opacity:1.0;height: 30px;

filter:alpha(Opacity=100, FinishedOpacity=100)

border: 2px;}
If you never change your Blogger NavBar before, Just insert the code. You can Look at Blogger Tip Trick No.4. to see where you must put the code. (or see #5)


5. The final position is  shown as below..


5. Finish...

Saturday, May 22, 2010

If you bother with the view of your Blogger NavBar (top of your blogger page), then you can get rid of it with the following ways:


1. Log in to Blogger .

2. On your Dashboard, select the Layout menu, than click the Edit HTML. Under the Edit Template you can see your Blog's HTML.

3. Insert this CSS definition as shown as below...


 4.We can easily show it again by removing the CSS definition


Sunday, May 9, 2010

I nstead of Making A Recent Comment as we've discussed before, We can also make A Recent Post with Feed Widget.


First we must ensure that our Comment Feeds are enabled cause we will use the Feed Widget


To do that, Go to your Dashboard >> click Settings of your Blog >> click Site Feed. Then set the “Blog Comment Feed” and “Per-Post Comment Feeds” to either “Short” or “Full”. Please do not choose “None”. Save the Settings.  


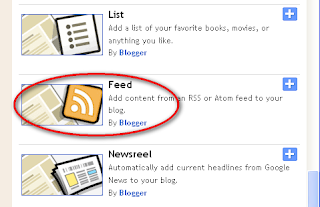
Next Go back to Layout >> Page Elements >> Add a Gadget in your sidebar, select “Feed”. You will be prompted to enter a Feed URL.


Insert RSS Feed as Blog Posts as follows :

http://doit2us.blogspot.com/feeds/posts/default?alt=rss
 
Please replace http://doit2us.blogspot.com with yours. After finished click Continue


Next, We can set "how to display" our  recent comment. We can named our Recent Comments by insert the Title column, Setting how much last comment we want to show up (5 by default). We can also choose to displayed the dates and name of the authors or not, and open links in new window.

After finished with the setting, click to Save the Changes.


We still can set the position of your recent comments by drag and drop the widget to the relevant part of our template and then Save the Template. 


Tuesday, May 4, 2010

Meta Tag Definition


A meta tag is a tag (a coding statement) in the Hypertext Markup Language (HTML) that describes some aspect of the contents of a Web page. Unlike normal HTML tags, meta tags do not affect how the page is displayed. Instead, they provide information such as who created the page, how often it is updated, what the page is about, and which keywords represent the page's content.


Meta Tag Function


The information that we provide in a meta tag is used by search engines to index our web page, most often to help search engines categorize them correctly, so that if someone searching for the kind of information as in our web page, they will be able to find it easily.


There are several kinds of meta tags, but the most important for search engine indexing are the keywords meta tag and the description meta tag. The keywords meta tag lists the words or phrases that best describe the contents of the page. The description meta tag includes a brief one- or two-sentence description of the page. Both the keywords and the description are used by search engines in adding a page to their index. Some search engines also use the description to show the searcher a summary of the page's contents.

Meta tag (element) used in search engine optimization, where different methods are explored to provide a user's site with a higher ranking on search engines. In the mid to late 1990s, search engines were reliant on meta data to correctly classify a Web page and webmasters quickly learned the commercial significance of having the right meta element, as it frequently led to a high ranking in the search engines — and thus, high traffic to the website.


Meta elements have significantly less effect on search engine results pages today than they did in the 1990s and their utility has decreased dramatically as search engine robots have become more sophisticated. This is due in part to the nearly infinite re-occurrence (keyword stuffing) of meta elements and/or to attempts by unscrupulous website placement consultants to manipulate (spamdexing) or otherwise circumvent search engine ranking algorithms.


Although meta tag have significantly less effect on search engine results pages today, and most search engines also use the contents of a page as a way to determine how to index it, the creator of a Web page should be sure to include meta tags with appropriate keywords and description. Well-written meta tags still can help make the page rank higher in search results.


How To Do It?


The meta tag is placed near the top of the HTML in a Web page as part of the heading. All the information that we want to be conveyed on our web page, can be enter between the tags <head>...</head> 


The meta tags writing format is:

<meta name="name" content="content"/>
or      <meta content='content' name='name'/>   


Note: we can use " as well as  '


As we have mentioned before, although  there are several kinds of meta tags (you can "search" to have more information about the kind of meta tags), but the most important for search engine indexing are the keywords meta tag and the description meta tag.


To be more easily understood, the following is an example of meta tags which are applied in this blog.

<?xml version="1.0" encoding="UTF-8" ?>

<!DOCTYPE html PUBLIC "-//W3C//DTD XHTML 1.0 Strict//EN" "http://www.w3.org/TR/xhtml1/DTD/xhtml1-strict.dtd">

<html expr:dir='data:blog.languageDirection' xmlns='http://www.w3.org/1999/xhtml' xmlns:b='http://www.google.com/2005/gml/b' xmlns:data='http://www.google.com/2005/gml/data' xmlns:expr='http://www.google.com/2005/gml/expr'>


    <head>


<meta content='New Blogger Tips For Us' name='Author'/>
<meta content='blog tips, tricks, help for all new bloggers on Web templates, Blog templates, designs, widgets, layout, JavaScript, HTML codes, SEO, Google AdSense, gadgets, diagnostic tools, and how to monetize Blogger or Blogspot blogs, learning by doing' name='description'/>
<meta content='blogspot, blog, tips, tricks, blogger tips and tricks, template, widget, layout, HTML codes, javascript, seo, SEO, google adsense, gadget, monetize, blogger' name='keywords'/>


    <b:include data='blog' name='all-head-content'/>

    <b:if cond='data:blog.pageType == &quot;index&quot;'>

    <title><data:blog.pageTitle/></title>

    <b:else/>

    <title><data:blog.pageName/> | <data:blog.pageTitle/></title>

    </bhttp://www.blogger.com/post-edit.g?blogID=8693675884300473333&postID=3139178726186289880:if>

    <b:skin><![CDATA[/*
If you want to do this trick.. then  Go to Your Dashboard >> Layout >> Edit HTML >> and add your meta tag code, just change the Red words with Your content tag. You can also add another meta (eg. 'generator').

If your home page consists of several languages, you can also define a language that you use the attribute "lang". For example, if the contents of your web documents written in French, you can use the attribute "lang" as follows:

<meta content='Your Content' name='Your Name' lang='fr'/>
Well.. that it's.. Happy SEO...!

Friday, April 30, 2010

Before we go any further to discuss this JavaScript - Small Tips II, I must remain you as in JavaScript I, that at least there are 2 think we must be consider to use the JavaScript apps , because to many JavaScript in your template will slowing down your web page to load. Besides that, for security reason, many user set their browser to disable JavaScripts. To resolve these problem, we must be wise to choose which the JavaScript that will be install into our template (choose the appropriate and useful JS apps) and use the "warning message" that we using JavaScript .


How To Make An Alert Message With JavaScript.


The functions of an alert message is to provide announcements, information or warning to the guests before they go to see or read the entire contents of our site.

There are a few display an alert message that we can create, an alert message box which only has a button 'OK', "OK" button and "cancel" to divert to other sites, and an alert message box with a dialog box.


Note: This tricks maybe annoying to some people, because this pop up box will STOP our browsing activity, we will not be able to do anything until we execute this pop up box (click OK or X).


An Alert Message Box With 'OK" Button.


We usually seen this message on "adult" or "serious" sites, the messages give warning to their visitor about the content of the sites and their restriction or limitation.

To create an alert message box, login to your account, go to Template -> Page Elements -> Add a Page Element in your left sidebar or post body area, and select HTML/JavaScript. And paste this code shown below.

<script type="text/javascript">
alert('You are about to enter our "serious" site. This site contains violence and sadistic material, persons under 18 years old are prohibited ... Beware!')
</script>
<noscript>Enable javascript in your browser to view an important message.</noscript>
Just change the Red words with your message..!, this words will be displayed as a pop up alert box when the visitors view your site / blog. The Purple words will show up when our guests disable their Javascript on their browser.

Look at this example below..


I put this "alert message" page element right under my header. This alert message box just for an information cause both choices, click "OK" button or click "X" will bring our visitor directly into our site (continuing to open our site).


An Alert Message Box With Confirmation ( "OK" and "Cancel" ) Button


For any reasons, sometimes we need to give our guests a choice not to continuing or cancel to visiting our website / blog. If our guests prefer to cancel, then they will be redirect into another URL address.

So if we want to do this trick, go to Template -> Page Elements -> Add a Page Element in your left sidebar or post body area or even below your header, and select HTML/JavaScript and Paste this code below.


<script type="text/javascript">

confirm('This site contains sadistic materials. Are you sure you want to continue?');

if (confirm('This site contains sadistic materials. Are you sure you want to continue?')) {

window.location = "http://doit2us.blogspot.com/";

}

else {

window.location = "http://www.google.com/";

}

</script>
Change the Red words with your message..!, the Blue URL is the URL destination address when our guests click the "OK" button, and the Purple URL is the URL destination address when our guests click the "cancel" button or click "X".


An Alert Message Box With Dialog Form


Besides give a warning or information to our guest, with this simple Javascript trick below, we can build a warning or information message + dialog form. In this example below, This trick is to give a warning to our guest, knowing the name, and give a welcome message. It,s a rather weird isn't it, but this just a sample, you can created better than this, I just want to share an Idea...


First Script

<script type="text/javascript">

alert('You are about to enter our "serious" site. This site contains violence and sadistic material, persons under 18 years old are prohibited ... Beware!')


var yourName = prompt("Please, write your name first...!", "Reader");

</script>


<noscript>Enable javascript in your browser to view an important message.</noscript>

<script type="text/javascript"></script>
The way what we done it, is the same with both  How To Make An Alert Message With JavaScript. above, I put the FirstScript page element below my header. Because this is a dialog box, of course we must have a follow up, to continuing the action, So I put a second script  in top of my post body as my welcome message.


Second Script

Thank you <script type="text/javascript">document.write(yourName)</script>! Feel free to look around. If you like what you read, please mention us in your post or link to this site. Enjoy your visit <script type="text/javascript">document.write(yourName)</script>
So this is what we got with those trick.

When first opened our site or blog, there will be a pop up box warning message just like the first trick,


after click "OK" or "X" button, there will be shown another pop up dialog box like this,


If the Guest write their name into the dialog box (eg. Mc4tur) and click "OK", then they will be brought to continuing opened our site with a welcome message in the place where we put the second script page element.


Well that's all, you can combined those tricks or make a modification (eg. put into the post). but please remember choose wisely because of the disadvantage of the JS tricks.

Friday, April 23, 2010

B efore we continuing discuss about How To Customize The Blogger Blog Post Footer, Let,s look at this picture bellow for the description...


1. Change The "AUTHOR" Text

Actually, this AUTHOR'S name is the name that shown on our blogger profile. To change this name then followed this steps.

Log in to Blogger, in Your Dashboard select your blog (if you have more then one) >> Layout >> Edit HTML and click Expand Widget Templates box. Then find this words data:post.author

<div class='post-footer'>


      <div class='post-footer-line post-footer-line-1'>

       <span class='post-author'>

          <b:if cond='data:top.showAuthor'>

            <data:top.authorLabel/> <data:post.author/>

          </b:if>

        </span>      

        <span class='post-timestamp'>

          <b:if cond='data:top.showTimestamp'>

            <data:top.timestampLabel/>

          <b:if cond='data:post.url'>

            <a class='timestamp-link' expr:href='data:post.url' title='permanent link'><data:post.timestamp/></a>

          </b:if>
A. To change your author's name, just replace the <data:post.author/> with whatever name you like.. This is mine when I change Mc4tur (before) with Admin.

Note: We can "decorate" our name with HTML code, I make it bold by adding Tex


B. To change the POSTED BY phrase, replace the <data:top.authorLabel/> with yours. This is mine when I change it into WRITTEN BY

 Note: We can decorate this with HTML Code too..


2. Change The "AUTHOR" Text With An Image

Because this tricks are about "knowing the posistion" of the AUTHOR, and we also know that we can "decorate" it with HTML Code. Instead of Text, we can replace it with our Image, or even combined them.


To do this tricks, of course we must have an Image (small signature will be better) first. Let's just say that we already have the image that we store in a host sever. Please remember the URL of your image.


Note: You can learn how to have free web storage in Using Google Groups and Google Sites as A Web Storage Space and how to use it in Create a Rainbow Colored Link


A. To change the Author text with your Image and blog link, just replace <data:top.authorLabel/> <data:post.author/> with this script.. 

<a href="Your Blog URL"><img src="Your Image URL" /></a>
If you don't want to insert your blog link, then just deleted it and only insert <img src="Your Image URL" /></a> Then the final script will be like this:

<div class='post-footer'>


      <div class='post-footer-line post-footer-line-1'>

       <span class='post-author'>

          <b:if cond='data:top.showAuthor'>

           
<a href="Your Blog URL"><img src="Your Image    URL" /></a> 

          </b:if>

        </span>      

        <span class='post-timestamp'>

          <b:if cond='data:top.showTimestamp'>

            <data:top.timestampLabel/>

          <b:if cond='data:post.url'>

            <a class='timestamp-link' expr:href='data:post.url' title='permanent link'><data:post.timestamp/></a>

          </b:if>


B. To combined with the text, choose which one will be replaced by the image. <data:top.authorLabel/> or <data:post.author/> . Usually we replace our name with Image. We can also combine with Text Replace (1B.)  either, to make WRITTEN BY "IMAGE NAME".

Monday, April 19, 2010

This trick is rather similar with How To Make A Spoiler In Second on purposed and the final display, Each technique have their "positive and negative" factor. I don't want to discuss the "more and less" of each trick, is up to you to decided which one that will fit to your purpose. Scrollbars will be very useful to minimized the text area and allowing readers to view the full contents by clicking the bar. We usually saw this technique implemented  for Terms of Service, User Agreements, Rules, or Privacy Policy.


To make a scrollbar within the blog post, first we must define a class (write into HTML Template), this action is giving the "name" to this class and setting the display when it show, and then to applied within the blog post, we must "call" the class (by writing the class in our blog post).


Log in to Blogger >> In your Dashboard choose your Lay out blog >> Edit HTML >> and Find /* Sidebar Content */ and put this script to define a class below it:

.scrollingpostbar {

height:350px;

width:450px;

border:0;

overflow:auto;

}
You can rename .scrollingpostbar as you like, as long as you remember the "name", set the height and weight and border by adjust 350, 450 and 0 to make it fit with your post.


After finished, then we can type the text, although the tittle is How To Make A Scroolbar Within Blog Post, actually we can use this scrollbar mode in the page element in our template, exactly the same as How To Make A Spoiler In Second .


To show up in our blog post, after we have typed the TEXTARTICLE in the Post Editor, then click “Edit HTML” and paste these tags, exactly as this position:

<div class="scrollingpostbar">TEXTARTICLE</div>
I wrote this article again and applied this trick to show up how is the final display for example:


This trick is rather similar with How To Make A Spoiler In Second on purposed and the final display, Each technique have their "positive and negative" factor. I don't want to discuss the "more and less" of each trick, is up to you to decided which one that will fit to your purpose. Scrollbars will be very useful to minimized the text area and allowing readers to view the full contents by clicking the bar. We usually saw this technique implemented  for Terms of Service, User Agreements, Rules, or Privacy Policy.


To make a scrollbar within the blog post, first we must define a class (write into HTML Template), this action is giving the "name" to this class and setting the display when it show, and then to applied within the blog post, we must "call" the class (by writing the class in our blog post).


Log in to Blogger >> In your Dashboard choose your Lay out blog >> Edit HTML >> and Find /* Sidebar Content */ and put this script to define a class below it:

.scrollingpostbar {

height:350px;

width:450px;

border:0;

overflow:auto;

}
You can rename .scrollingpostbar as you like, as long as you remember the "name", set the height and weight and border by adjust 350, 450 and 0 to make it fit with your post.


After finished, then we can type the text, although the tittle is How To Make A Scroolbar Within Blog Post, actually we can use this scrollbar mode in the page element in our template, exactly the same as How To Make A Spoiler In Second .


To show up in our blog post, after we have typed the TEXTARTICLE in the Post Editor, then click “Edit HTML” and paste these tags, exactly as this position:

<div class="scrollingpostbar">TEXTARTICLE</div>
To make a scrollbar in page element.  Our Text or HTML/Javascript Code can be inserted directly into the template via Layout -> Page Elements -> Add a Gadget >> Text or HTML/JavaScript. Similarly, if we have typed it in the rich editor mode, we can click the “Edit HTML” link at the top right corner and insert the above tags.


After publishing the post or saving the page element, you will be able to see the text or HTML/JavaScript gadget within a box and the scrollbars automatically inserted. 

Note : this trick only works on Text or HTML/JavaScript gadget.

Friday, April 16, 2010

T his article is the end of my "trilogy" How To Make A Scrollbar In Your Blogger Widget I, II, and III.


As I mention in HTMS II  The best result of the "scrollbar mode" is when applied to each widget, because we can full-controlled which of our widget that we want to make it in "scrollbar mode" and which one is not.. This method is a bit complicated but give us the best results.


The technique of "how to make it scrollbar mode" is the same as HTMS I and II. But the secret of this method is "to find the name of each of our widget".


The following are some examples of the widget "name":

Adsense

Blog

BlogArchive

Followers

Header

HTML

Label

Linklist

Text
 Those "name" represents the widget, so in the application, we can estimate the  widget (location) by their name. Actually those "name" are following by the number as an complete "Id" eg. Adsense1, HTML4. If we only have one widget in our template than the following number is 1 eg. Adsense1, if we add a second same widget eg. we put another adsense into our template than the widget name will be Adsense2 and so on. Note : Blog means the blog post.


If you not sure with which one is? Take it easy, just try it and preview it, if you find it wrong than you can delete the script and try the other, you just make sure to remember what you have done before to corrected it later.


To be more easily understood, I will use my HTML Template for the explaination.


I want to make my "BLOGGER TIPS ARCHIVE" in "scrollbar mode" From the "name" this widget must be the BlogArchive, because I don't have another archive widget, I can assure that the widget Name/Id in my template is BlogArchive1. So I Go to my Dashboard >> Layout >> Edit HTML.

To make it sure that I maybe forgot have been installed another blog archive and or have "wrong script blog archive"then I try to find BlogArchive (I use Ctrl+F in my FF Browser).

After sure that I've only got BlogArchive1. Next... I find /* Sidebar Content */ (in some case, may be you'll found like mine, with ----- ) and add the script right after it:

/* Sidebar Content */

#BlogArchive1{
height:200px;
overflow:auto;
}
 
This is before:

And this is after:


 How To Overcome The Third-Party Display Rules Widget.


As we've discussed in HTMS I, when installing third-party widgets eg Google Adsense, we are forbidden to cut display or display them truncated. 

By knowing the name of our widget, then we can set the height and weight for each of our widget. We can also set the scrollbar to all of our widget (like HTMS I) or by sidebar (like HTMS II) and make exceptions to certain widget.

For example, if our AdSense unit is a 160x600 Vertical Wide Banner, then we must set the height of the widget as 600px. Because the contents fit nicely into this size, then the scrollbars should not appear. So it will not break the Third Paty rules.

/* Sidebar Content */

#AdSense1{
height:600px;
}


That's All.. You have another trick about scrollbar ? Please share with us..


Wednesday, April 14, 2010

In How To Make A Scrollbar I, we have discussed about making the scrollbar on the whole widget (Sidebar), unfortunately this situation will be a problem if we install a third-party widgets that forbids us to change / cut their display widget (eg Google Adsense).


To overcome that problem we need advanced trick.


One Sidebar "Scrollbar Mode"


If your template has been modified to have 2 sidebar (like this blog), then we only need to put the third-party widgets on the first sidebar along with other widgets to apply non "scrollbar mode" sidebar, and to place the other widgets on the second sidebar to be made "scrollbar mode". In the other words, we classify the widgets into 2 groups and put into the separate sidebar, non "scrollbar mode" sidebar and "scrollbar mode" sidebar.

This method is the same as we do in How To Make A Scrollbar I, but we have to insert the script below one of the "sidebar-id's" that we will create a "scrollbar mode" sidebar.


The most important is you must know and find  your "modification (add) sidebar name", cause this is the key of this method,  so you can put the script below it. Let us use my blog as a sample, I make 3 modification sidebar, named #sidebar-wrapper, #second-sidebar1-wrapper, and #second-sidebar2-wrapper (please look at the position..!).

 So, depend of my choice to make a scrollbar mode on one of my sidebar, than The script that can be inserted into my template will be like this (Go to your Dashboard >> Layout >> Edit HTML and find /* Sidebar Content */ in some case, may be you'll found like mine, with -----  and add this script right after it) :

/* Sidebar Content */

#sidebar-wrapper{

height:200px;

overflow:auto;

}
The display will be like this:

Or this,

/* Sidebar Content */

#second-sidebar1-wrapper{

height:200px;

overflow:auto;

}
Or this,

/* Sidebar Content */

#second-sidebar2-wrapper{

height:200px;

overflow:auto;

}
Unfortunately, all of your widget in your "scrollbar mode" sidebar  become only "one scrollbar".


Actually, the best result of the "scrollbar mode" is when applied to each widget, this method is a bit complicated but give us the best results.

We will discuss it in the next post...

Wednesday, April 7, 2010

There are several ways to customize the look of widgets that are too long in our blog pages. Two of them have been discussed in How To Make A Dropdown List I and II.


If in How To Make A Dropdown List I and II. we abbreviate the display of labels and other widgets with a dropdown list, then in this article we will discuss how to adjust our widget display in the form of scrollbar.


According to Wikipedia, a scrollbar (Also known as a handle in the very first GUIs) is a graphical object in a graphical user interface (GUI) with which continuous text, pictures or anything else can be scrolled  including time in video applications, i.e., viewed even if it does not fit into the space in a computer display, window, or viewport.


With scrollbarr method, we can set how long the display of our widgets, so that the view from our blog pages will become more neatly arranged.


Actually, it's very easy to make a scrollbar in our widget.  Log in to your Blogger Blog, Go to your Dashboard >> Layout >> Edit HTML and find /* Sidebar Content */ (in some case, may be you'll found like mine, with ----- ), we only need to add this simple script code. just below /* Sidebar Content */

/* Sidebar Content
----------------------------------------------- */


.sidebar .widget{

height:250px;

overflow:auto;

}
This is my blog page views before :

And this is after :

We can set the height of the scrollbar to fit our blog page by change the value 250 (px), Please try  to change into 200px or 300px, you'll know the differences and will be found your match lenght...


When there is a sentence in the widget contents that exceed the sidebar limit, like in my NEW BLOGGER TIPS LABELS, then there will be a horisontal scrollbar automatically show up.


If you want to (I personally do not need it because there is already wide settings sidebar), you can also add Horisontal Scrollbar deliberately to set the width of the widget, by copy this script code width: 200px; (change the number 200 as you want) and paste right under height:250px;, so it will look like,

/* Sidebar Content

----------------------------------------------- */

.sidebar .widget{

height:250px;

width:200px;

overflow:auto;

}
ATTENTION : This trick will set all of our widget in sidebar being a scrollbar mode, So please make sure if you have installed widgets from third parties (like Google Adsense), this scrollbar tricks does not violate their Term Of Service or their rules. I am not responsible if you get in trouble because of this trick...!!!


To overcome those problems, we can make a scrollbar in our blogger widget separately one by one... We will discuss it soon in my next post.. How To Make A Scrollbar In Your Blogger Widgets II and III.

Tuesday, April 6, 2010

I am too late knowing a great news, because just today I know that 11 days ago I got an email from Blogger Team, whose contents are as follows:


We’re excited to announce that the Blogger Template Designer is now available on Blogger in draft, Blogger’s experimental playground.


The Blogger Template Designer makes it easy to customize the look and feel of your blog without knowing any HTML or CSS. Here are a few of the new features available in the Blogger Template Designer :


    * Beautiful new templates to start from

    * Custom blog layouts with one, two and three columns

    * Hundreds of background images

    * Customizable colors, fonts, and more...


What are you waiting for? Express yourself in style with the Blogger Template Designer. Learn more at www.blogger.com/templates.


The Blogger Team


With great enthusiasm I hurried to follow the link provided in the email ..


Wow .. If prior to the date 03-27-2010 Blogger only offers standard templates as we already know (rather boring) since last few days, the Blogger add facilities to enhance your display settings templates.


There are quite a lot of facilities added to the Blogger settings, ranging from the addition of templates with different variations, a variety of background images, to the layout settings, and other settings such as the division of the column footer into 2 or 3 columns.


Everything we can do with an easy step in a few clicks, yes .. exactly like the contents of an email from the blogger team, we can modify our templates without needing to know HTML or CSS code.


This could be a "big punch" to many "tutorial blogs" that so far has a busy traffic because of the many novice bloggers who are looking for information about the articles that contain how to modify the blogspot template (by modifying the template CSS and HTML code).

Blogger Team made millions of tutorials blog looks like a "foolish tutorial", killing mosquitoes with a shotgun.


Although not apply yet to my personal blog because of my limited time to explore, but this is really great news, additional facilities have been long-awaited by millions of users Blogspot.


I hope I could write my experience in using of these Blogger latest facilities as soon as possible

Wednesday, March 24, 2010

Dofollow is a term given to web page or sites / blog which provides (outbound) links to the comments. whereas Nofollow is the opposite.


Here are the advantages and disadvantages of each, Dofollow and Nofollow..


Dofollow

The advantages of the dofollow blogs (sites) is able to increase the blog traffic, as will a lot of visitors who leave their "link traces", that will attract more advertisers who are interested in displaying their ads

The risk of dofollow blogs is that you should be ready to receive comments from spammers who comment without reading the contents of your article or put not relevant link.


Nofollow

The advantages of nofollow blogs is able to filter out spam comments from visitors, The comments obtained truly reflects what the visitors (readers) opinion and not just a "polite" comments and wanted to leave a link. 

The disadvantages is the visitors and advertisers will be reduced from your blog, because usually they will find DoFollow blogs to enhance their position in search engines.


Actually default setting attribute comments from blogger is Nofollow. To tun it into Dofollow, here are the steps we have to do.


Log in to your Blogger >> Dashboard >> Layout >> Edit HTML >> and check the Expand Widget Templates.

Find this script

href='data:comment.authorUrl' rel='nofollow'
and deleted  rel='nofollow', and save template. simply as that...


Note:

To determine whether a blog, is DoFollow or Nofollow. just View their page source, right click on a web page, and select page source, find the href code, if followed by the code rel = 'nofollow' it means that the blog is nofollow, if not there is DoFollow. For an easier way just find rel = 'nofollow' if we do not find then that blog is dofollow.

Tuesday, March 23, 2010

A couple days ago, I found a comment contain with 10 links that not relevant with the article that I have post (spam comment). Since this incident,  I want to give brief tips for New Blogger about How To Delete Spam Comments In Blogger Blog.


Log in to Blogger. In your Dashboard >> choose your blog that you want to delete the comments (if you have more than one blog) >> and click View Blog.

Click the Title of the article that contain the comment that you want to delete >> and look at the "spam" comments.

Just Click the trash image and we will brought to the confirmation page.

Make sure to check the Remove forever? box if you want to delete that comment forever, but remember that this action can not be undone. After you have decided tu check or uncheck... Simply click the DELETE COMMENT.


Done.. the comment will be vanished and leaving the comments name / id and a notice that "This post has been removed by a blog administrator."

Sunday, March 21, 2010

Back to Top is a Navigation link at the bottom of the web page. Provide by site owner to jump back to the top of the page.

Sometime when we visited a Website or Blog, In addition to interested in the main article, we are also interested in some "information" that (intentionally placed by the owner to attract visitors) is located at the top of a web page. After finished reading the main article, it would be very helpful if there is a navigation link to the top of the page, so we only need a single click to navigated away to the top page to continue explored another "information" that attracted us.

To make this widget, we must declare the CSS Code of the widget first (declare the name and parameters that set the display widget in browser) then write / put the widget code itself (div id="widget-name") in its position (bottom)


In your HTML Template (Dashboard > Layout > Edit HTML) insert this CSS above ]]></b:skin> 

/* Credit

----------------------------------------------- */

#credit {

margin: 0px 0px 0px 0px;

padding: 2px 0px 0px 0px;

width: 100%;

height: 26px;

clear: both;

font-family: verdana, helvetica;

font-size: 70%;

color: #444444;

font-weight: normal;

background: #777777;

}


#creditleft {

margin: 0px 0px 0px 0px;

padding: 7px 0px 0px 0px;

height: 26px;

position: relative;

float: left;

text-align: left;

display: inline;

width: 71%;

background: #ffffff;

}


#creditright {

margin: -33px 0px 0px 0px;

padding: 7px 0px 0px 0px;

height: 26px;

position: relative;

float: right;

text-align:right;

display: inline;

width: 30%;

background: #ffffff;

}


#creditleft p {

margin: 0;

padding: 0

}


#creditright p {

margin: 0;

padding: 0

}


#creditleft a, .creditleft a:hover, .creditleft a:visited {

color: #444444;

text-decoration: underline;

}


#creditright a, .creditright a:hover, .creditright a:visited {

color: #444444;

text-decoration: underline;

}
We are not going to discuss the CSS Code above, but if we read line by line you will get the "picture" of this widget display settings (please look at the bottom of this page to see the result of the setting...!!!). You can replace the parameters to match with your template. ex: backgrounds or fonts color.


Next, Copy this Widget Script and Paste at the bottom of your HTML Code above the closing tag </body>


<div id='credit'>


<div id='creditleft'>

<p><b>&#160;&#160;&#169; <a href='http://doit2us.blogspot.com/'>New Blogger Tips For Us</a> <i>Free Blogger Template</i> by <a href='http://doit2us.blogspot.com/'>Mc</a> 2010</b></p>

</div>


<div id='creditright'>

<p><b>Back to <a href='#outer-wrapper'>TOP</a>&#160;&#160;</b></p>

</div>


</div> <!-- end credit -->
The final position will be like this :

Widget Script

</body>

</html>
That's all, If you want to... You can replace the Blue with Your Link and Text... And last, do not forget to save your template, view your blog and... enjoy your new "Back to Top" widget

Friday, March 19, 2010

How To Make a JavaScript Externally


As I mentioned in How To Make Recent Comment II and How To Make a Related Posts Widgets in Blogger.. One of the problems with the JavaScript code in our template, is to make our web loading page  become slower relatively or even could not see if there is something wrong with Script Js itself or the browser used.


To overcome this problem, we can put this Script (JS) externally.

So when the visitors browse our Site or Blog, their browser will reading our template Script first and then Script external JS after.

With this method our visitors still can see our page with more faster, although maybe there is a problem with JavaScript or compatibility of Browser used. (This is why some site owner write "warning text" on their web page "This Site Will Look Perfect In X, Y and Z browser".)


To make an external JavaScript, the first step of course, we must have a server / web host to store our JS file. If you do not have and want to have a web storage for free please read "Using Google Group and Google Sites as Web Storage".


After we have a host sever then the next step is to make your script as a JS file. Just simply find your  JavaScript code, Cut it and Paste in your Notepad and save it as a JS file (.js), Store your JS file into your host server and put some "calling" code into your HTML template.


Please take look at How To Make a Blogger Related Post. cause I will use this article to make an explanation.


To make the Related Post JavaScript externally, Just Cut..! the Related Post JavaScript (the green code) and paste in your Notepad, then Save it as yourkodescript.js.  

Next ..Upload / store this file into your web host and remember the URL link.


Write this folowwing script exactly on the place where the Related Post JavaScript was before.     

<script src='http://Yourwebhost.com/yourkodescript.js' type='text/javascript'/>  
The final position will look like this,

]]></b:skin> 

The Display Setting Script

<script src='http://Yourwebhost.com/yourkodescript.js' type='text/javascript'/>

</head>
Note :  The rest of the step to make related post widget are still the same...


Inform About The Existence Of JavaScript In Our Template


Because afraid of there are malicious script contained in JavaScript files, especially external JavaScript. Many users decided to configured their browser to disable the script, so that the script will not be able to see/read, and this means that your visitor couldn't be able to view all of your JavaScript build widget.


To anticipated this situation, we can inform to our visitors about the existence of JavaScript in our template / widget and maybe giving an explanation or guarantee that there is no malicious script inside it or no harm or it's safe.


To do this, we can simply add a small script at the end of your JavaScript Code.

JavaScript

<noscript>You need to enable JavaScript to read this.</noscript>
Just like what I have done in How To Make Recent Comments. If the visitor disabled the JavaScripts browser, There will be warning text below my "recent comments title" that's says "You Need to enable JavaScript to read this"


You can edit the 'explanation text' as you want..  how about add "Guarantee 100% no harm"..!!


Please, Write your comments.. and maybe you want to share your secret JS tips..., will be nice...

Tuesday, March 16, 2010

Actually I had long enough to discuss about how to make a related posts widgets in blogger because of it's very useful function.

 According to the name - related post - this widget provides information to visitors who are reading our articles that there are other articles that discuss the similar or related topic that maybe they will be interested with. The main goal is to make our guess visiting times become longer, this means making our blogs become more populair and for those who put some ad on their site / blog, it will give more chance that the ad will get attention from the visitors.


After a long search from internet about how to make it, I found quite a lot of tutorial on "blogger related posts". Almost all of them use external JavaScript, some working and some did not. Most of Not Working related posts widget because of it's server and the other because of it's wrong Script, it seems to be a little miss code when posting the article. ( please read How To Posting Source Code in Blogger Post / Articles ).


Both long and/or short script related post widget that we find in the "blogger related post widget"  Tutor, actually consist of two major parts. JavaScript Codes that serves to showing related post itself, and HTML / CSS Codes that used to set the display of related post.


In this article I will not discuss about setting the display of related post widget, because we can find a lot of ways out there even displaying the related post with it's screenshot link.


As I ever mention in How To Make Recent Comment II. The use of external JavaScript (File JS stored on outside server) can speed up our web pages loading times. The problem is we often can not see directly the contents of those Java Script, because the server restrictions or by the owners file setting. This will lead us to fear of the presence of malicious script inside those "invisible" JavaScript.


So in accordance with the title Blogger Related Post - The Naked Script, I will give a Related Post JavaScript -Naked-  So you do not feel worry anymore cause you can see it's contents.


//<![CDATA[

var relatedTitles = new Array();

var relatedTitlesNum = 0;

var relatedUrls = new Array();

function related_results_labels(json) {

for (var i = 0; i < json.feed.entry.length; i  ) {

var entry = json.feed.entry[i];

relatedTitles[relatedTitlesNum] = entry.title.$t;

for (var k = 0; k < entry.link.length; k  ) {

if (entry.link[k].rel == 'alternate') {

relatedUrls[relatedTitlesNum] = entry.link[k].href;

relatedTitlesNum  ;

break;

}

}

}

}

function removeRelatedDuplicates() {

var tmp = new Array(0);

var tmp2 = new Array(0);

for(var i = 0; i < relatedUrls.length; i  ) {

if(!contains(tmp, relatedUrls[i])) {

tmp.length  = 1;

tmp[tmp.length - 1] = relatedUrls[i];

tmp2.length  = 1;

tmp2[tmp2.length - 1] = relatedTitles[i];

}

}

relatedTitles = tmp2;

relatedUrls = tmp;

}

function contains(a, e) {

for(var j = 0; j < a.length; j  ) if (a[j]==e) return true;

return false;

}

function printRelatedLabels() {

var r = Math.floor((relatedTitles.length - 1) * Math.random());

var i = 0;

document.write('<ul>');

while (i < relatedTitles.length && i < 20) {

document.write('<li><a href="'   relatedUrls[r]   '">'   relatedTitles[r]   '</a></li>');

if (r < relatedTitles.length - 1) {

r  ;

} else {

r = 0;

}

i  ;

}

document.write('</ul>');

document.write('<a rel="dofollow" href="http://doit2us.blogspot.com">Learn How To Make This Related Posts Widget [?]</a></font>');

}

//]]>
We can simply created Related Post Widget by putting this JS directly inside our HTML template codes...


Go to your Dashboard >> Layout >> Edit HTML and check Expand Widget Templates.

Find this codes

]]></b:skin>  

</head> 
and Put this simple display setting Script between it,

<style> #related-posts { float : left; width : 540px; margin-top:20px; margin-left : 5px; margin-bottom:20px; font : 11px Verdana; margin-bottom:10px; } #related-posts .widget { list-style-type : none; margin : 5px 0 5px 0; padding : 0; } #related-posts .widget h2, #related-posts h2 { font-size : 20px; font-weight : normal; margin : 5px 7px 0; padding : 0 0 5px; } #related-posts a { text-decoration : none; } #related-posts a:hover { text-decoration : none; } #related-posts ul { border : medium none; margin : 10px; padding : 0; } #related-posts ul li { display : block; background : url(&quot;https://blogger.googleusercontent.com/img/b/R29vZ2xl/AVvXsEgDaLZwrTmqD5GfxqdW6ssgsVdc2MS4lNWMhs1beOXVeQsXtJdJTfkkX8QrAmfM2PkisofoxLr_IrG6wkNBFw9DHQwhHObod1Xvpwj85BmiIEKGBNLjdvtsMg8uk_8eiS8rMEtpg8mc3qE/&quot;) no-repeat 0 0; margin : 0; padding-top : 0; padding-right : 0; padding-bottom : 1px; padding-left : 21px; margin-bottom : 5px; line-height : 2em; border-bottom:1px dotted #cccccc; } </style>
Next put the JavaScript right after (below) it. So the final Script will look like :

]]></b:skin> 

The Display Setting Script

Related Post JavaScript

</head>
Next search for <data:'post.body/>. In some templates this code may look like: 


<div class='post-body>

Add this folowing script just below  <data:'post.body/>

<b:if cond='data:blog.pageType == "item"'>

<div id="related-posts">

<font face='Arial' size='3'><b>Related Posts : </b></font><font color='#FFFFFF'><b:loop values='data:post.labels' var='label'><data:label.name/><b:if cond='data:label.isLast != &quot;true&quot;'>,</b:if><b:if cond='data:blog.pageType == &quot;item&quot;'>

<script expr:src='&quot;/feeds/posts/default/-/&quot;   data:label.name   &quot;?alt=json-in-script&amp;callback=related_results_labels&amp;max-results=5&quot;' type='text/javascript'/></b:if></b:loop> </font>

<script type='text/javascript'> removeRelatedDuplicates(); printRelatedLabels();

</script>

</div></b:if>
After finished all, Save Your Template and click View Blog.. there you go.. You have new related post widget in your blog.


Note :

  • To make this related post widget works.. then you must have more than one article with the same label/tag/catagories. 

  • This related post widget not work in your main page (home).


We will discuss more about this related post widget setting in the next artikel.


Disclaimer:We does not host any of the templates available on this blog. This blog merely indexes other sites contents.